All materials came from Home Depot:
Zinsser Cover Stain, Oil-based Primer (1 qt.)
Behr Premium Plus Ultra, Interior Satin Enamel, Ivory Palace (1 qt.)
Foam Roller (6")
Foam Brushes (for the details)
Wooden Trim (for drawer fronts)
Drawer Hardware

Directions:
1. After removing the old hardware, I thoroughly cleaned the inside and outside of the dresser with warm water and Greased Lightning (degreaser) as the dresser had been sitting in storage for a while.
2. I decided to attach the drawer trim before painting (don't know if it was easier or not) using a miter box/saw, measuring tape, and a nail gun. Tip: When attaching the trim to the drawer fronts, use a bit of wood glue in the corners, as that will eliminate any gaps in the mitered corners. I also used a corner sander to smooth down the rough edges and make for a better fit.


3. Now time to paint...I believe the "trick" to get that Pottery Barn finish is the foam roller/brush applicator and not necessarily the paint itself. First, I painted two coats of primer to the insides of the drawers and the top of the dresser as those areas were the most stained. Everything else got one coat. Tip: I used a completely different paint tray, foam roller, and brush to paint the outside of the dresser as I did not want the possibility of transferring dirt from the insides of the drawers to my outside finish.

4. Next, I painted two coats of the paint (it also has primer in it) to the outside of the dresser and one coat on the insides of the drawers. Tip: On the dresser top, I paid special attention to my roll marks to ensure a smooth finish. The less pressure placed on the roller, the better.

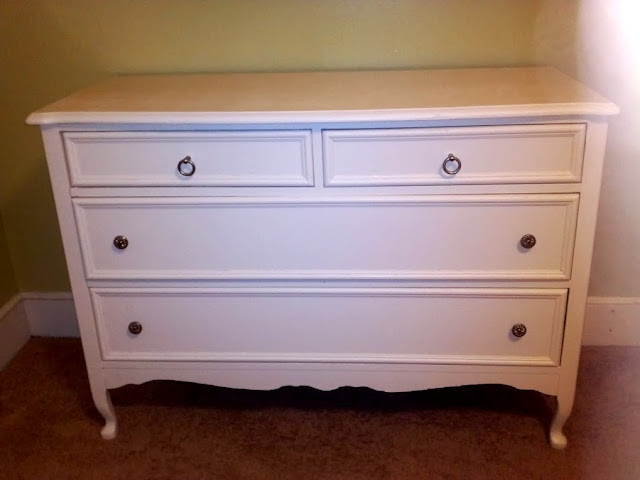
5. The hardest part of the project was waiting on everything to dry and cure fully before placing the hardware back on and moving it to its new home. I plan on using this method in the future with a nightstand and mirror.


Go DECORATE!!
Kaitlin
Special thanks to my sister Kindal for creating the masterpiece. I'm still waiting on my own......


Go DECORATE!!
Kaitlin
Special thanks to my sister Kindal for creating the masterpiece. I'm still waiting on my own......
No comments:
Post a Comment